A useful closet renovation before after is not about adding more white shelving and calling it finished. It shows how a dark, awkward room became easier to use because the door swing changed, the rods fit real clothing, and the lighting stopped casting shadows. I have worked on closets in older Oklahoma City homes where every inch mattered, and the strongest results started with the room's bones rather than baskets or matching hangers.
Before you draw a cabinet plan, measure the room, locate the studs, note every outlet, and photograph the ceiling. A closet can look square while the walls vary by more than an inch from one corner to the next. That difference affects drawer alignment, filler panels, and whether an island leaves a usable walkway.
Start with the floor plan, not the accessories
A practical walk-in closet needs a clear aisle. I use 36 inches as the minimum comfortable passage, and 42 to 48 inches is better if two people dress in the room or if drawers open into the walkway. An island should not be installed simply because the room is large enough on paper. A 24-inch-deep island plus two 24-inch storage walls consumes 72 inches before you account for movement.
Check the door swing next. A door that opens into a hanging section can steal an entire corner. Reversing the hinges, using a pocket door, or choosing a 30-inch outswing door can recover valuable storage without changing the room's footprint. Mark the door's full arc with painter's tape before demolition. If the tape crosses a future drawer, the plan is wrong.
Hanging depth usually needs 24 inches from the finished wall to the front edge of the rod. Shelves for folded clothes can be 12 to 16 inches deep, while shoe shelves often work well at 12 inches. Anything deeper becomes a place where sweaters disappear behind one another. For long garments, reserve at least 60 inches of vertical space; dresses and coats need more if they are not meant to brush the floor.
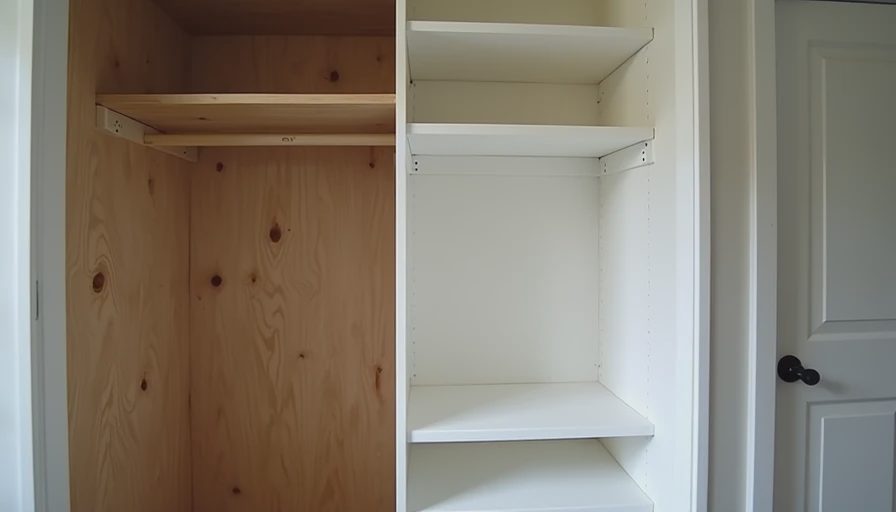
What a strong closet renovation before after reveals
Look closely at the photographs, not just the color of the cabinets. The best closet renovation before after comparison shows a change in circulation and visibility. In one 1940s house, the original closet had a single wire shelf around three walls. The owner had plenty of volume but could not see the back third of each shelf. We replaced it with two hanging levels on one wall, drawers on another, and shallow adjustable shelves in the corner.
That layout gave short shirts a double-hang section, with a lower rod around 40 inches above the floor and an upper rod around 80 inches. Long-hang clothing moved to a 24-inch-wide bay. The owner did not gain a larger room; she gained categories that were visible at a glance. That distinction matters. Storage capacity is not useful if retrieving one blouse requires moving six boxes.
For a narrow closet, use the longest uninterrupted wall for hanging and place shelves at the end wall. For a wider room, drawers can sit below hanging clothes, but leave enough clearance for handles and knees. Avoid putting drawers in the corner unless the adjacent unit has a filler panel. Two doors cannot occupy the same corner gracefully.
Electrical and lighting decisions you cannot hide later
Lighting is where many renovations become expensive to correct. A single ceiling fixture usually leaves your face in shadow and makes dark clothing difficult to distinguish. Plan a centered ceiling fixture plus LED strips or low-profile fixtures under shelves. Choose a color temperature around 3000K to 3500K so clothing colors look natural without the harsh blue cast common in utility lighting.
Have an electrician confirm circuit capacity and switch locations before drywall. Add a switch near the entrance, not behind the door. If you want a lighted mirror, steamer, charging drawer, or ironing station, place outlets before the cabinets are built. I once saw an outlet specified behind a shoe tower; it was technically present but inaccessible. That is not a feature. It is a future service call.
Use code-compliant fixtures rated for the installation location, and keep cords out of hanging areas. If the closet is in an older home, investigate ungrounded wiring and overloaded circuits before adding several fixtures. The electrician's visit is cheaper before paint, shelving, and trim are installed.

Materials and costs that hold up in real rooms
A basic reach-in update using painted melamine, a new shelf, and replacement rods can land around $500 to $1,500, depending on labor and wall repairs. A small walk-in with drawers, adjustable shelves, and upgraded lighting often reaches $3,000 to $7,000. More elaborate custom cabinetry, an island, hardwood flooring, and electrical work can push the project beyond $10,000.
Those numbers are planning ranges, not a promise. The expensive mistake is spending on decorative details before solving the layout. A $900 drawer bank is useful when it replaces unstable plastic bins. A $3,000 island is wasteful when it reduces the aisle to 28 inches.
Melamine is practical, consistent, and easy to clean. Painted plywood or furniture-grade plywood costs more but can make sense for exposed ends, heavy drawers, or a room where cabinetry needs to match existing millwork. Wire shelving is inexpensive and ventilated, but small items fall through and folded stacks tend to slump. I use it when the budget is tight, not because it is the best answer for every wardrobe.
Use the wardrobe to set the storage plan
Before ordering anything, count your actual clothing. Measure the longest coat, the widest hanger, and the height of boots. Separate daily clothing from seasonal pieces. In Oklahoma City, a winter coat section may sit mostly empty for months, while summer shirts need much more accessible double-hang space.
A useful closet renovation before after plan might include 6 to 8 feet of double hanging, 3 to 4 feet of long hanging, a drawer stack for undergarments, and adjustable shelves for sweaters and bags. The exact mix depends on the wardrobe. Someone with mostly dresses needs a different room from someone who wears jeans and knit tops every day.
Leave at least one adjustable section. Wardrobes change, and fixed shelves become inconvenient when boots replace flats or folded sweaters replace handbags. Put frequently used items between waist and eye level. Use high shelves for luggage, holiday clothing, and archival boxes, but do not pretend they are daily storage.
A renovation sequence that prevents expensive rework
Start by photographing the empty room and marking studs, outlets, vents, baseboards, and door swing. Draw the plan at scale, including finished wall thickness. Confirm the aisle with cardboard mockups before ordering cabinetry. Then complete electrical changes, wall repairs, flooring, paint, and trim before installing the storage system.
If flooring is changing, install it under permanent cabinets when practical, especially with floating floors that need proper expansion space. Protect finished floors during installation. Assemble one drawer and one shelf section first so you can verify color, hardware, and fit before the entire room is built.
The final closet renovation before after photographs should show more than a tidy room. Open every drawer, walk through with the door open, test the switches, and hang the longest garments. If the room works when you are half-awake at 6:15 AM, the renovation succeeded. If you need a step stool to reach daily shoes or squeeze sideways past an island, take the lesson from the comparison and revise the plan before spending another dollar.




No comments yet — be the first to share a thought.