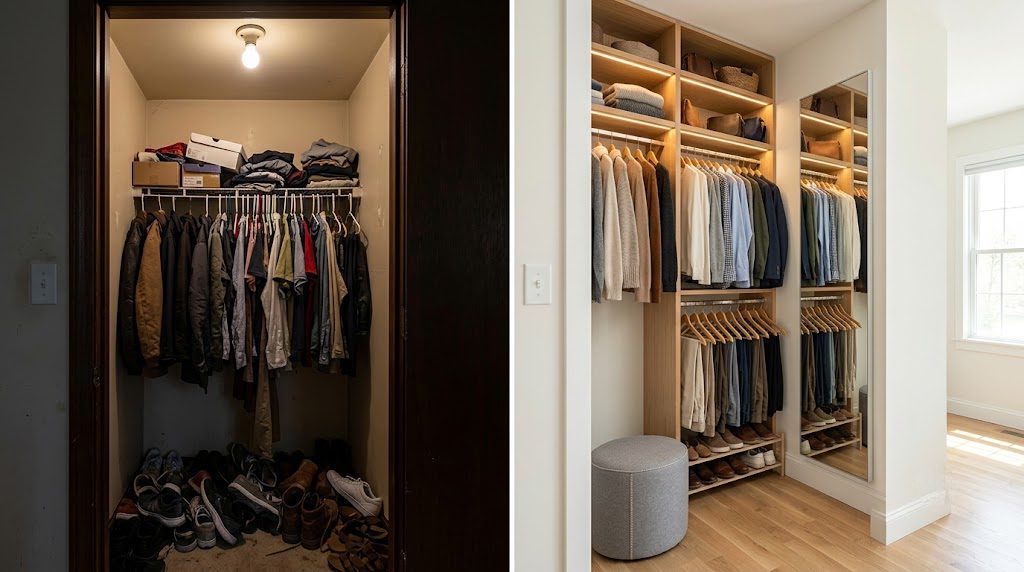
Some closets are blank canvases. This one was a crime scene.
The house was a 1923 bungalow in Oklahoma City's Gatewood neighborhood — original hardwood floors, arched doorways, the kind of character you can't replicate. But the primary bedroom closet was an afterthought. Thirty-two square feet. A single wire shelf bowed under the weight of too many hangers. Shoes lived in a heap on the floor. The light fixture was a bare porcelain socket with a pull chain. My client, Sarah, had been dressing out of this closet for six years. She was exhausted.
She called me after finding my name through a local contractor. The brief was simple but loaded: "I want to want to stand in here." Not a boutique. Not a sanctuary. Just a room she didn't dread entering at 6 a.m.
The Before: 32 Square Feet of Bad Decisions
The original closet was a narrow rectangle — roughly 8 feet wide by 4 feet deep, with a standard swing door that opened inward and immediately blocked the left half of the hanging rod. The single wire shelf was mounted at 64 inches, which is the default height for people who don't want to think about rod height. Sarah is 5 foot 4. Her shirts dragged on the shelf above. Her long dresses pooled on the floor. The rod itself was starting to pull away from the wall on the right side because the installer had missed the stud.
The floor was original hardwood — beautiful, but scarred from decades of shoes and a water stain near the back wall from a roof leak that had been repaired years ago. There was no outlet. No natural light. The pull-chain bulb cast a sickly yellow glow that turned everything beige.
Sarah's wardrobe is modest but real: a professional woman's collection of blouses, trousers, a few dresses, winter coats, and an admittedly extensive boot collection she was not willing to negotiate on. She told me this upfront: "Don't tell me to donate my boots, Kate. Just build around them."
I respected that immediately.
The Plan: Work With the Footprint, Not Against It
Thirty-two square feet is not a walk-in. It's barely a generous reach-in. So I didn't try to make it something it wasn't. The plan was to treat the entire space as a built-in wardrobe system — floor to ceiling, wall to wall — with the door swing as the governing constraint.
Layout Changes
I moved the door. This was the single most expensive line item in the project, and it was non-negotiable. The original door swung inward and left, eating 30 inches of usable hanging space on the left wall. We reframed the opening for an outward-swinging door with a frosted glass panel, which gave us back the entire left wall and brought borrowed light from the bedroom through the glass. The door now swings out, not in. Clearance problem solved.
Inside, I designed two full walls of floor-to-ceiling storage. The left wall became a double-hang zone with rods at 82 and 42 inches — shirts and blouses up top, trousers and skirts below. The right wall became a mixed zone: long hang at the back for Sarah's dresses and coats, and open shelving at the front for folded sweaters and a dedicated boot shelf at floor level. The back wall, which had been dead space, became a full-length mirror with integrated LED side lighting and a shallow accessories drawer beneath it.
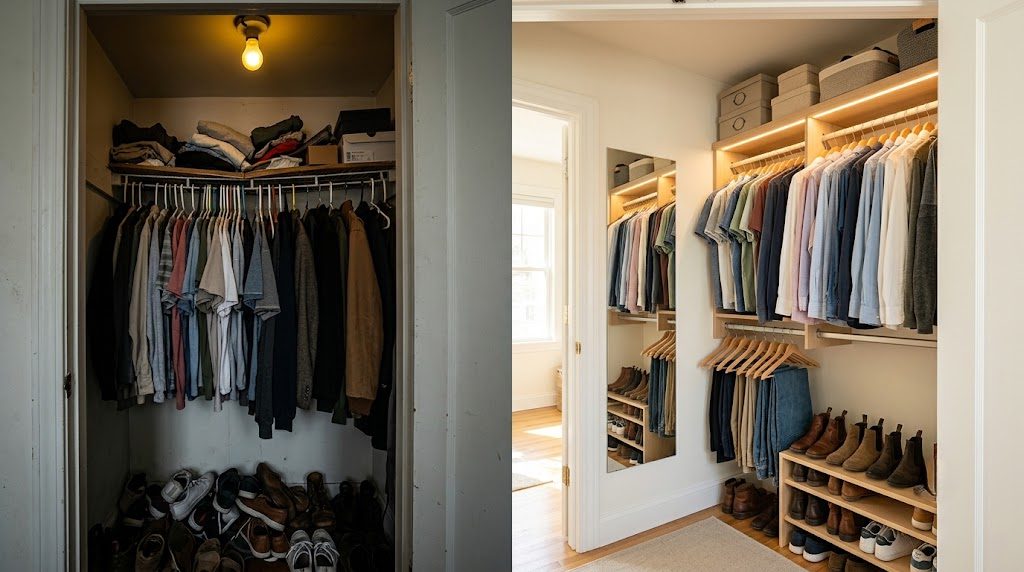
The Late-Stage Change That Saved Everything
Three days before install, Sarah called me. She had been standing in her empty closet — we had cleared it out and patched the drywall — and she realized something. "Kate," she said, "there's no outlet in here. Where am I going to plug in my steamer?"
She was right. In the original plan, the only electrical was the pull-chain light, and we had planned to replace it with an LED ceiling fixture. But nobody — not me, not the electrician, not Sarah — had thought about outlet placement. This is the kind of detail that gets forgotten because closets aren't treated like real rooms. But a steamer needs an outlet. A charging station for a smartwatch needs an outlet. A future lighted mirror upgrade needs an outlet.
The electrician was able to add a single outlet on the right wall, about 42 inches from the floor, tucked just inside the long-hang section but accessible. It added $350 to the budget and a half-day to the schedule. It was the best $350 we spent on the entire project. Sarah uses that outlet every single morning.
The lesson I took from this: always, always spec at least one outlet in a closet at 40 to 48 inches from the floor. Write it into the electrical plan before the drywall goes up. If you forget, it will cost more to add later, and you'll still pay it because you need it.
The Cost Breakdown
Here's what the project cost, in Oklahoma City pricing. These numbers are from 2023; your market will vary, but the proportions should hold.
Door reframe and new outward-swinging door: $1,800 including labor and materials. Custom melamine closet system (two walls, floor-to-ceiling): $4,200 installed, including soft-close drawers, adjustable shelving, and a mix of double-hang and long-hang zones. Electrical: $850 for the LED ceiling fixture, integrated shelf lighting, and the steamer outlet. Mirror and accessories drawer: $600. Floor refinishing: $900 for the original hardwood sanded and sealed. Total: $8,350.
Could she have done it for less? Yes. IKEA PAX with custom trim could have saved roughly $2,000 on the closet system. But Sarah wanted a permanent, built-in solution she wouldn't have to think about again, and the melamine system with quality edge banding and soft-close hardware will outlast her time in this house. She considered it an investment in her morning sanity. After six years of that wire shelf, I think she earned it.
The After: A Room She Wants to Stand In
The finished closet is bright, functional, and honest. It's not a magazine spread. The boot shelf has scuff marks on it after six months of use. The long-hang section holds a winter coat that's seen better days and a dress Sarah wore to her daughter's wedding. The steamer lives on a hook next to the outlet, not hidden away in a cabinet. It's a room that works.
Sarah told me last month that she now opens the closet door in the morning and feels calm instead of overwhelmed. That's the metric that matters. Not square footage, not resale value, not whether the hardware matches the plumbing fixtures in the bathroom. Just whether the room does its job at 6 a.m. when you need it most.
This project taught me that the best closets don't need to be big. They need to be planned for the real person who stands in them, with the real clothes they own, and the real mornings they live.




No comments yet — be the first to share a thought.