Walk in closet layout design is mostly a math problem dressed up like an organizing project. Before you buy a single drawer box, you need to know where the studs are, which way the door swings, how wide the aisle stays after the rod and shelves go in, and whether the lighting will let you tell navy from black at 6:15 a.m. A pretty closet that pinches the walkway or blocks a drawer is just expensive drywall.
I start with the room itself, not the accessories. If the space is a former bedroom corner or a bumped-out dressing room, I want the measurements on paper before anyone orders a system. I have seen people spend real money on shoe towers and velvet-lined trays, then discover the outlet is on the wrong wall or the trim eats into the hanging depth. In a small room, that kind of mistake is not cosmetic. It decides whether the closet works at all.
The Bones First
The first thing I check is what the walls can support. Stud locations matter because rods, tall cabinets, and wall-mounted islands are only as solid as the blocking behind them. If you want a full-height tower, you need to know whether the installer can hit studs cleanly or add blocking before drywall closes things up. That is the kind of detail people skip when they are staring at pretty renderings, and it is why a system that looked fine on the screen ends up wobbly in real life.
Door swing comes next. A hinged door can steal a surprising amount of usable floor area, especially if it opens into the closet instead of out into the hall. In a tight room, I would rather use a sliding door or a pocket door than lose 30 inches of circulation to a bad swing. I also pay attention to ceiling height, because an 8-foot room can take a different shelf stack than a 9-foot room, and that changes the whole proportion of the build.
One client wanted plush carpet all the way through the closet because it felt soft underfoot. It did feel soft. It also caught lint, made the hamper hard to roll, and forced us to shorten the bottom drawers just enough to annoy her every morning. Pretty finishes are fine, but the bones should be decided before anybody shops for them.

Aisle Width and Door Swing
The aisle is the part most people underbuild. For a single-sided closet, 36 inches is the minimum I like for a clear walkway, and 42 inches feels better if the room allows it. Once you put a full-depth hanging run on both sides, the room can get tight fast, because standard hanging depth is about 24 inches on each wall. That leaves very little forgiveness if the closet also has a door, an island, or a hamper sticking out.
This is where I see bad layout decisions snowball. Someone wants a bench, then a shoe cabinet, then a mirror, and suddenly the only path through the room is sideways. If the room is narrow, give the wall space to hanging and drawers before you give it to furniture. A bench is nice. A closet that lets you open a drawer without turning your hip is nicer.
For a shared closet, divide the room by function, not just by person. One side can hold long garments and bags, while the other side uses double hang for shirts, skirts, and folded pieces. That structure keeps the aisle cleaner and makes the room easier to read when you are half awake and looking for one black blouse.
The Structure Behind a Walk in Closet Layout Design
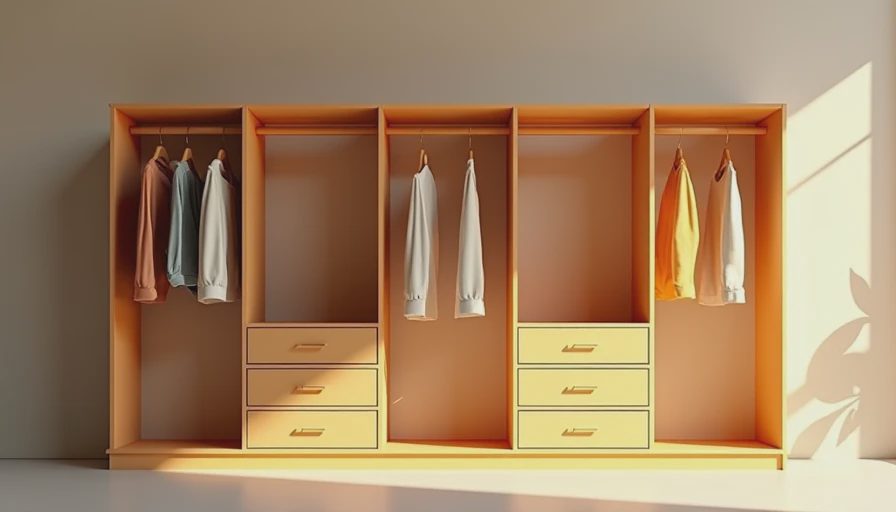
The best walk in closet layout design uses the wardrobe you actually own, not the one on a Pinterest board. A client with five winter coats needs different clearances than someone whose life is mostly blouses, denim, and sneakers. Long-hang sections usually need about 66 to 72 inches of clear height, while double-hang runs work best when each tier has roughly 40 to 42 inches of vertical space. That is how you get more hanging in less wall length without bunching sleeves or dragging hemlines.
Shelves are another place where people guess wrong. For folded sweaters, bags, and hats, 12 to 14 inches of shelf depth is usually enough. Make them deeper and the pile turns into a cave. Drawers should be deep enough for real use, not just pretty photos. I like them for socks, T-shirts, belts, and jewelry because they keep the top surface from becoming a dumping ground.
If you are choosing between systems, IKEA PAX and The Container Store Elfa both make sense in different budgets. PAX gives you a lot of size options for the money. Elfa is flexible if you want to adjust later. Custom built-ins cost more, often starting around $3,000 and climbing fast, but they earn their keep when the room has odd angles, sloped ceilings, or a finish level that needs to match the rest of the house.
Lighting and Electrical
In walk in closet layout design, lighting is not decoration. A single ceiling fixture throws shadows exactly where you do not want them, which is why people can own twenty black tops and still grab the wrong one. I like a bright overhead light, then task lighting under shelves or inside tall cabinets so the contents read clearly. LED tape is cheap insurance here, and it makes drawers and shelves look finished instead of dark and cave-like.
I also want the switch where your hand lands as you enter the room. If you have to walk three feet into the closet in the dark to find it, the layout is wrong. Add an outlet if you can. A steamer, hand vacuum, charging drawer, or valet rod setup all become more useful when power is already in the room. I once saw an electrical outlet placed right behind a future shoe wall because nobody coordinated the install. That is the kind of error that turns into an expensive apology.
Build for the Wardrobe You Own
If your closet holds more dresses and coats than folded clothes, give that wall the longest uninterrupted hanging run. If your routine is workwear and separates, prioritize double hang and a few deep drawers. If shoes are the problem, do not waste half the room on decorative shelves nobody uses. Measure the tallest heel, the widest boot, and the number of pairs you actually rotate, then build to that number instead of guessing.
Seasonal storage matters too, especially in a place like Oklahoma City where summer clothes and winter layers trade places every year. I tell clients to keep the current season at eye level and move the off-season into higher shelves or labeled bins. That keeps the daily zone small and quick, which is the whole point of a good closet.
Where to Spend the Money
If you are budgeting, spend first on structure, lighting, and hardware that moves every day. Good drawer slides, sturdy rods, and a layout that does not waste aisle space will pay you back faster than fancy mirrored doors. A basic wire or laminate system can work for a few hundred dollars in a reach-in or a small walk-in. A midrange modular build often lands in the $800 to $2,500 range before labor. Custom work, specialty finishes, and islands push higher from there.
That is why I keep coming back to walk in closet layout design before finishes. Get the room to function, then make it prettier. If the layout is right, even a simple melamine system can feel smart and calm. If the layout is wrong, no amount of matching bins will fix the daily friction.
If you are planning a closet project and want it to feel easy at 6:15 a.m., start with the room dimensions, the door, and the aisle. The rest is just deciding how much of your wardrobe deserves prime real estate.



No comments yet — be the first to share a thought.