A shoe closet organizer should solve a storage problem without creating a new obstacle in the middle of your closet. Before you buy one, measure the wall, count the pairs you actually own, and look at how the door swings. A narrow rack that fits 20 pairs on a product page may fail in your room if it blocks a drawer, leaves boots on the floor, or wastes the only useful outlet.
I start every closet project with the room's bones. Find the studs, note the baseboard height, and mark the location of heating vents, switches, and outlets. If you are building a new shoe wall, tell the electrician before drywall goes up. One client had an outlet placed directly behind the center of her shoe cabinet. The cabinet had to move six inches, which reduced the aisle and forced a late change to the hanging layout.
Measure the wall before choosing a shoe closet organizer
A useful shoe closet organizer begins with accurate dimensions, not a shopping cart. Measure the clear width between walls, then measure from the finished floor to the underside of any shelf or countertop. Record the depth of nearby hanging sections. Standard shoe shelving is often 10 to 14 inches deep, while tall boots can require 16 inches or more to sit flat without bending the shaft.
For a comfortable walk-in closet, preserve at least 36 inches of clear aisle space. I prefer 42 inches when two people use the room or when a drawer bank opens into the passage. A 24-inch-deep cabinet on one side and a 14-inch shoe unit opposite it can consume 38 inches before accounting for trim and handles. That may look acceptable on paper and feel cramped every morning.
Use painter's tape on the floor to outline the proposed cabinet. Open the closet door, pull out every drawer nearby, and stand inside the taped footprint while reaching for a pair. This simple test catches more problems than a polished online rendering.

Pick shelf spacing for your actual shoes
A shoe closet organizer needs adjustable shelves if your collection includes more than sneakers and flats. Low shoes usually need about 6 to 7 inches of vertical clearance. Running shoes, loafers, and most casual boots work better with 8 to 10 inches. Ankle boots commonly need 10 to 12 inches, while taller boots can require 15 to 18 inches depending on the shaft.
Fixed shelves can be less expensive, but they lock you into one arrangement. A row designed for sandals becomes wasted space when you add western boots. Pin-adjustable shelves let you move two shelves down and combine the openings when seasons change. Look for shelves with a front edge or a shallow lip; otherwise shoes can slide forward when the cabinet is bumped.
Do not stack delicate leather shoes directly on top of one another. Stacking may save space, but it can crease uppers and scuff hardware. Clear drop-front boxes work for a small collection, although they become tedious when you have 40 or 50 pairs. For a working closet, open shelves are usually faster and easier to maintain.
Choose the right shoe closet organizer material
Melamine is a practical choice for most homeowners. It has a clean finished surface, wipes down easily, and is available in systems from retailers such as The Container Store and IKEA. The edge banding matters more than the sales label. Poorly sealed edges can chip when heavy boots are dragged across a shelf.
Plywood with a durable laminate costs more but handles custom sizing and repeated use well. It is a sensible upgrade for a built-in shoe wall or a cabinet that will carry heavy footwear. Solid wood looks good, but it is rarely necessary for every shelf. Spend the difference on strong hardware, better lighting, or a properly anchored installation.
Wire racks are inexpensive and useful in a reach-in closet, but inspect the spacing before buying. Thin heels can fall through wide gaps, and dirty soles can leave marks on the wall behind the rack. A solid shelf or removable tray is easier to clean in homes where shoes regularly collect Oklahoma red dirt, road salt, or wet grass.
Plan for boots, cleaning, and seasonal rotation
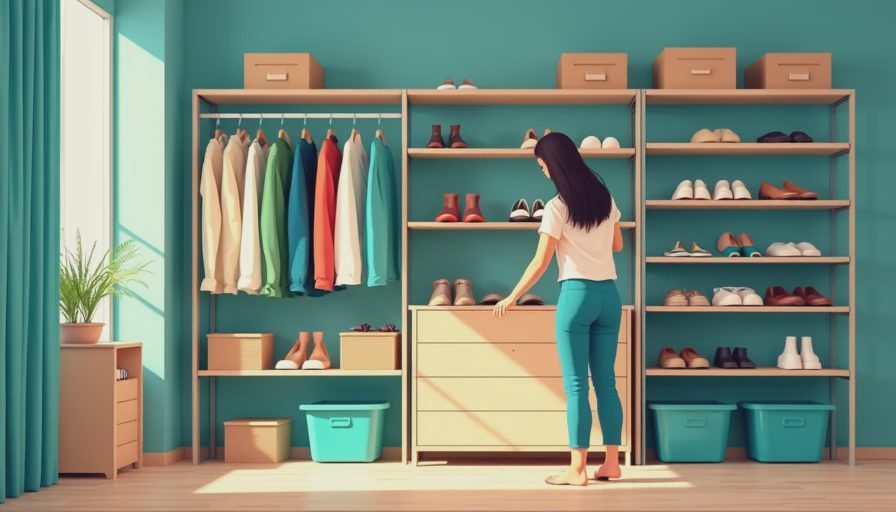
The best shoe closet organizer includes a deliberate place for awkward footwear. Reserve the tallest openings at the bottom or on one end of the unit for riding boots, rain boots, and winter footwear. Do not cram tall boots into a short cubby and expect them to recover. Boot shapers are useful, but they also add height, so measure with the shaper inside the boot.
For everyday shoes, place the most-used pairs between waist and knee height. That keeps you from kneeling on the floor at 6:15 AM. Put formal shoes and seasonal sandals higher up, provided you can reach them safely. A small step stool is preferable to standing on a storage bin.
Leave a washable mat or tray near the entry side of the closet. It gives muddy soles a temporary landing place and protects the cabinet base. If the closet has carpet, use a low-profile tray rather than placing wet shoes directly on the fibers. This is a small detail, but it prevents a shoe-storage project from becoming a flooring problem.
Installation details that prevent expensive mistakes
Anchor any tall shoe closet organizer to wall studs or use appropriate wall anchors for the cabinet weight. A fully loaded shelf is much heavier than an empty one, especially when it holds boots. Do not rely on drywall anchors alone for a tall, narrow unit that someone could pull forward.
Check the baseboard before installing. You may need a notch, a spacer, or a recessed back to make the cabinet sit square against the wall. If you skip that step, the unit can lean forward and doors may not align. In an older Oklahoma City house, walls are not always plumb, so measure at the top, middle, and bottom rather than assuming one width is enough.
Lighting deserves attention too. A dark shoe cabinet turns every morning into a search. A surface-mounted LED strip or a properly installed low-voltage light can illuminate shelf fronts without adding heat. Plan the switch location before the cabinet is secured, and keep cords out of the aisle.
What to spend and where to save
A basic freestanding rack can cost roughly $30 to $100. Modular systems often land between $150 and $600 depending on width, drawers, doors, and finish. A custom built-in shoe wall can reach $1,000 to $3,000 or more after installation, especially when it includes lighting, tall boot storage, and matching cabinetry.
Spend first on capacity, anchoring, shelf adjustability, and aisle clearance. Those features affect the room every day. Save on decorative doors if dust is not a concern, and skip rotating carousels unless the closet is unusually deep. Carousels use hardware and floor area that could provide more straightforward shelf storage.
If you are comparing a shoe closet organizer from IKEA, Elfa, ClosetMaid, or a custom shop, compare usable shelf width rather than the advertised number of pairs. A system that claims 30 pairs may hold fewer when your collection includes size 11 sneakers, boots, and shoes with substantial soles.
A good final test is simple: can you see the pair you want, remove it without moving three others, and return it without forcing the shelf? If not, redesign before you install. The right shoe closet organizer is not the one with the most compartments. It is the one that fits the structure of the room, matches your footwear, and still works when you are half-awake and late for work.


No comments yet — be the first to share a thought.