Closet systems are not magic boxes that make a bad room functional. They are storage components attached to real walls, squeezed around doors, outlets, vents, and the clothes you actually wear. Before ordering drawers or matching hangers, measure the room, locate the studs, and decide how you move through it at 6:15 AM. A clean plan will save more frustration than an expensive finish.
Start With the Room, Not the Catalog
Draw the closet to scale, including every wall, door swing, window, baseboard, outlet, light switch, and HVAC register. A reach-in closet usually needs about 24 inches of hanging depth, while a walk-in closet needs a clear aisle of at least 36 inches. If two opposing walls have storage, 42 to 48 inches feels considerably better when two people are dressing or a drawer is open.
Door swing is an easy detail to miss. A hinged door can steal nearly 30 square feet of usable movement, depending on its size. A pocket door or outswing door can release valuable wall space, but only if the wall can accommodate the pocket and has no plumbing or electrical conflicts. Do not let an installer cover an outlet you use for a steamer or vacuum. Relocating it after panels are installed is an avoidable repair.
Find the studs before you select a hanging layout. Most wall-mounted closet systems need secure fastening into framing or properly rated blocking; drywall anchors alone are not a plan for a loaded double-hang section. If you are renovating, add horizontal blocking between studs before drywall. Photograph the open walls and keep the pictures. They will be useful when a future installer needs to locate solid attachment points.
Lighting deserves the same early attention. A single ceiling fixture often casts your body between the light and the shelf you are searching. Recessed fixtures, a central flush mount, or low-profile LED strips under shelves can solve that problem. Put the switch near the entry, and plan the circuit before cabinetry closes the walls.

Choose the Layout Around Your Wardrobe
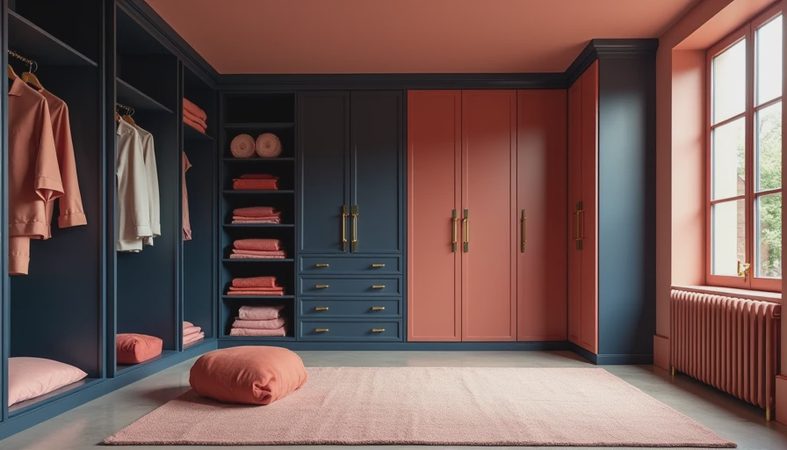
Closet systems work when each zone has a job. Use double-hang sections for shirts, folded pants, skirts, and jackets. A practical upper rod sits around 80 to 84 inches from the floor, with a lower rod around 40 to 42 inches. Full-length hanging for dresses, robes, and coats usually needs 60 to 68 inches of vertical clearance, depending on the garments and your preferred hem position.
Shelves are not automatically better than drawers. Open shelves are efficient for sweaters, jeans, handbags, and linens, but stacks become unstable when they are too tall. I usually keep everyday folded stacks below 10 or 12 inches. Drawers are better for underwear, workout clothing, jewelry, and accessories that disappear in deep piles. A 24-inch-deep drawer can hold a lot, but a 14- to 18-inch depth is easier to see and reach in most dressing areas.
Shoe storage needs a measurement, not a product photo. Low boots need more vertical clearance than flats, and tall boots may require 18 inches or more. If you own many pairs, avoid dedicating the entire closet floor to shoes. A two-tier shelf with adjustable heights often holds more and is easier to clean than a decorative carousel. Leave enough front clearance to pull out a shoe tray without blocking the aisle.
Compare Materials and Construction
The most affordable closet systems often use melamine-coated particleboard. It is practical, easy to wipe down, and available in common white, gray, and wood-look finishes. The weak points are exposed edges, long unsupported shelves, and hardware that is difficult to replace. Ask how shelves are supported and whether the edge banding is glued securely. A sagging shelf is usually a span problem, not a storage problem.
Plywood costs more and handles fasteners well, but the finish may require paint or laminate. Solid wood can be beautiful for a bench, drawer fronts, or a freestanding island, but using it for every panel can consume a budget quickly. Wire shelving is inexpensive and ventilated, though small items can tip through the gaps and folded clothing may develop shelf marks. I have installed all three approaches; the right choice depends on load, visibility, humidity, and how permanent the installation needs to be.
Closet systems from IKEA, The Container Store, and custom local shops occupy different parts of the budget. Modular products can work well for a careful DIY installation, especially in a straight reach-in. Custom work costs more because someone measures, designs around obstacles, fabricates panels, and installs the result. A basic reach-in project might start around several hundred dollars, while a professionally installed walk-in can reach several thousand or more once drawers, lighting, paint, and electrical work are included.

Spend First on the Parts You Touch
If funds are limited, prioritize drawer hardware, shelf supports, and the sections used every day. Soft-close drawer slides are worth paying for because cheap slides become noisy and frustrating quickly. Full-extension slides let you see the back of a drawer instead of losing socks in a dark corner. Adjustable shelves also earn their cost because wardrobes change when seasons, work schedules, or household members change.
An island is not automatically an improvement. A 24-inch-deep island with a 36-inch aisle on both sides needs at least 96 inches of room before accounting for trim or drawer pulls. In a smaller walk-in, a narrow dresser or freestanding vintage cabinet may provide better storage without blocking the turn. I once measured a proposed island that left only 28 inches at the entry. It looked impressive on paper and would have been miserable to use.
Plan electrical access before the final panel goes on. A concealed outlet behind a shoe wall is useless if you cannot plug in a steamer. Put at least one outlet near a counter or dressing surface, and consider a USB charging outlet only where devices will actually rest. Keep cords away from hanging clothes and do not bury a power strip behind permanent cabinetry.
A Practical Installation Sequence
Begin by emptying the room and marking proposed cabinet edges on the floor with painter's tape. Walk the route with a laundry basket, open an imaginary drawer, and hold a coat against the wall. This test catches tight turns faster than a computer drawing. Then confirm stud locations, blocking, outlet heights, baseboard conflicts, and ceiling conditions.
Install wall-mounted components level, even if the floor slopes. Shim where necessary rather than forcing a long unit to follow an uneven floor. Secure tall towers at the top so they cannot tip. Assemble drawers and doors only after the main cases are anchored. Finally, adjust hinges, install pulls, add lighting trim, and load the closet by category instead of filling every inch on the first day.
Closet systems should make the morning sequence shorter: open the door, see the options, reach the right shelf, and leave without fighting a drawer. If the plan needs a ladder for everyday clothes or forces you to move three boxes to reach one sweater, it is not finished. Measure carefully, spend on hardware that gets daily use, and let your real wardrobe—not a showroom photograph—decide what belongs on the walls.



No comments yet — be the first to share a thought.